Windows updates are crucial for maintaining the security and performance of your PC. However, there may be times when you need to disable them temporarily or permanently for various reasons. In this guide, we’ll walk you through the steps to disable Windows 11 updates forcefully. Keep in mind that you should only disable updates with caution, as it can leave your system vulnerable to security threats.
if you want to disable Windows 11 updates forcefully, there are two main ways to do it: using the Group Policy Editor or using the Registry Editor.
Disable Windows 11 updates using the Group Policy Editor
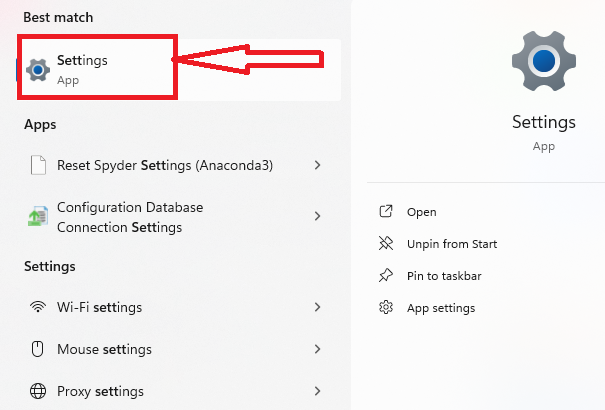
Step 1: Open the Windows Settings
To get started, click the Windows icon in the taskbar or press the Windows key on your keyboard. This will open the Start Menu. From there, click on the gear-shaped icon to access the “Settings” menu. Alternatively, you can press “Win + I” on your keyboard to directly open the Settings.
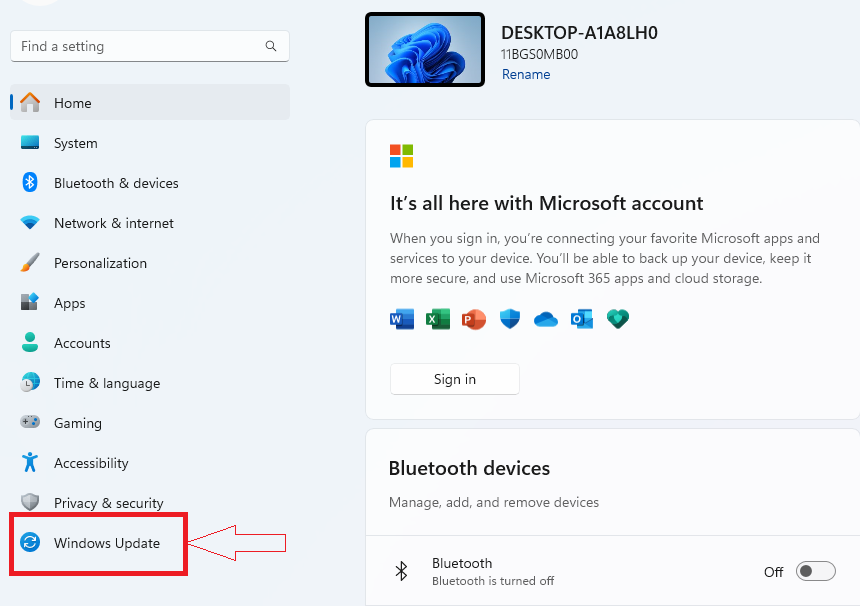
Step 2: Access the Windows Update Settings
Click on the “Windows Update” option, typically located in the lower left corner of the window, within the Settings menu.. This will take you to the Windows Update settings page.
Step 3: Configure Advanced Options
On the Windows Update settings page, click on the “Advanced options” link. This will open a new window with advanced options for configuring Windows updates.
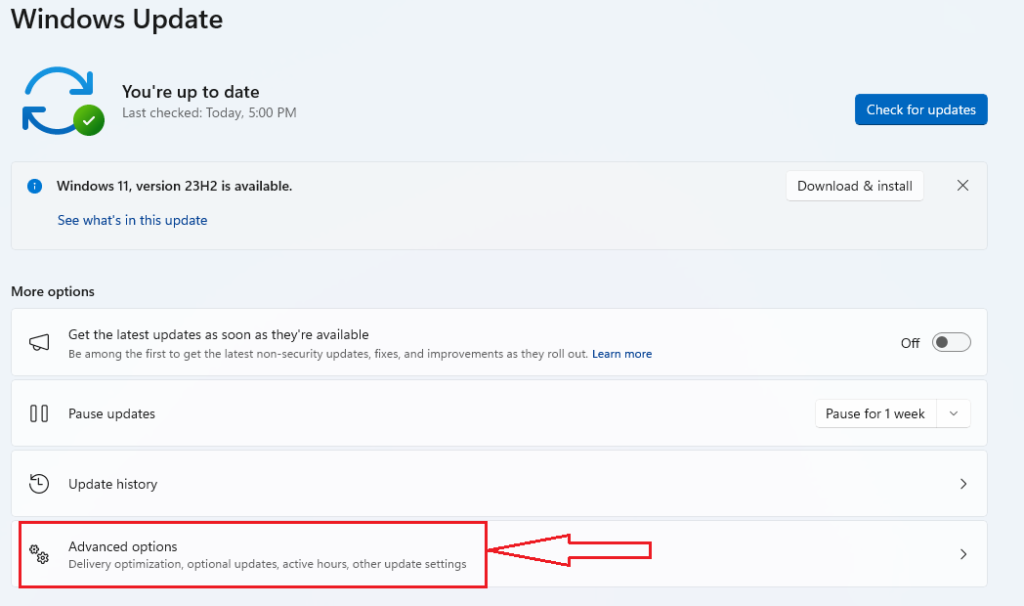
Step 4: Pause Updates
In the “Advanced options” window, you’ll see a section labeled “Pause updates.” Click on the drop-down menu, and you’ll be presented with several options. To temporarily disable updates, you can select a pause period of up to 35 days. This is a safe way to prevent updates from automatically installing for a limited time.
Step 5: Set a Longer Pause Period (Optional)
If you require more time before updates are installed, you can extend the pause period beyond 35 days by clicking the ‘Select a date’ option and choosing a date further in the future. This is a suitable option if you want to disable updates for a more extended period.
Step 6: Disable the Windows Update Service (Advanced Users)
If you want to disable updates more forcefully and for an extended period, you can do so by disabling the Windows Update service. Most users do not recommend this method because it can leave your system vulnerable to security risks. Here’s how to do it.
a. Press “Win + R” on your keyboard to open the Run dialog.
b. Type “services.msc” and press Enter to open the Services window.
In the Services window, scroll down to find “Windows Update.” Right-click on it and select “Properties.” In the “Startup type” drop-down menu, choose “Disabled,” then click “Apply” and “OK.”
This will prevent the Windows Update service from running, but it is essential to note that this approach is not recommended for typical use. Regular updates are crucial for keeping your system secure and up-to-date.
Step 7: Re-enable Updates (Optional)
If you’ve temporarily paused updates or disabled the Windows Update service but wish to re-enable them, follow the same steps as above and select “Resume updates” from the “Pause updates” drop-down menu or set the “Startup type” for the Windows Update service back to “Automatic.”
Method 2. Disable Windows 11 updates using the Registry Editor
Disabling Windows 11 updates using the Registry Editor is an advanced and forceful method that should be used with caution. It’s crucial to understand that this approach can potentially leave your system vulnerable to security risks, as updates often include important security patches. Only use this method if you have a specific reason for disabling updates and are aware of the potential risks.
Here’s a step-by-step guide on how to disable Windows 11 updates using the Registry Editor
Before proceeding, it’s strongly recommended to create a backup of your system and registry. Incorrect changes to the registry can cause system instability.
- Open the Registry Editor
- Press
Win + Ron your keyboard to open the Run dialog. - Type
regeditand press Enter.
2. Navigate to the Windows Update Registry Key
In the Registry Editor, navigate to the following key
HKEY_LOCAL_MACHINE\SOFTWARE\Policies\Microsoft\Windows\WindowsUpdate
If the “WindowsUpdate” key does not exist, you’ll need to create it. Right-click on the “Windows” key, select New, and then choose Key. Rename the new key to “WindowsUpdate.”
3. Create a New DWORD Value
Right-click on the “WindowsUpdate” key you just created (or the existing one), select New, and choose DWORD (32-bit) Value.
Name the new DWORD value “AUOptions” (without the quotes).
4. Set the Value Data
Double-click on the “AUOptions” DWORD value you just created.In the “Edit DWORD (32-bit) Value” dialog, set the “Value data” to one of the following values:
2: This value disables Windows Update.3: This value enables Windows Update but notifies you before downloading and installing updates.4: This value enables Windows Update and automatically downloads and installs updates.
Choose the appropriate value based on your preference (disabling updates would typically use the value “2”).
5. Save and Exit
Click “OK” to save the changes and then close the Registry Editor.
6. Reboot Your Computer
After making these changes, it’s a good practice to reboot your computer to ensure that the changes take effect.
Conclusion
Disabling Windows 11 updates should be approached with caution, as regular updates are essential for maintaining the security and stability of your PC. In most cases, it’s best to use the built-in pause options to temporarily delay updates when necessary. However, forcibly disabling updates is not recommended for most users, as it can expose your system to security vulnerabilities.
Always stay informed about the importance of updates and only use these methods sparingly and when absolutely necessary. Remember that keeping your system up to date is essential for a safe and smooth computing experience.