Migrating virtual machines (VMs) from VMware ESXi to Proxmox VE can seem daunting, but with the introduction of the Proxmox VE Import Wizard, the process has become significantly more manageable. This blog post will provide a detailed guide on how to leverage this tool for a seamless transition, ensuring minimal downtime and preserving your VM configurations.
Why Migrate to Proxmox VE?
Proxmox VE is an open-source virtualization platform that offers numerous advantages over VMware ESXi:
- Cost Efficiency: Proxmox VE is free to use, with optional paid support. This can lead to substantial savings, especially for small businesses or home labs.
- Rich Feature Set: It includes built-in support for high availability, live migration, and backup solutions, making it a robust choice for enterprise environments.
- User-Friendly Interface: The web-based interface is intuitive, allowing users to manage their virtual infrastructure easily.
- Community Support: Being open-source, Proxmox VE has a vibrant community that contributes to its development and provides support through forums and documentation.
Understanding the Proxmox VE Import Wizard
The Proxmox VE Import Wizard is designed to simplify the migration of VMs from VMware ESXi. It allows you to import VMs as a whole with most configurations mapped directly to Proxmox’s structure. This tool utilizes public APIs from VMware ESXi to streamline the process and reduce downtime.
Key Features of the Import Wizard:
- Integrated Storage Plugin: The import wizard uses a storage plugin system for native integration into both the API and web interface.
- Support for Multiple ESXi Versions: The tool supports VMware ESXi versions 6.5 through 8.0, making it versatile for various environments.
- Configuration Mapping: Most of the original VM configurations are automatically mapped to Proxmox’s configuration model, ensuring continuity in performance and settings post-migration.
Step-by-Step Guide to Using the Import Wizard
1. Prepare Your Proxmox Environment
Before starting the migration process, ensure that your Proxmox VE host is updated to version 8.2 or later. You can do this by executing:
apt update && apt full-upgrade
After updating, reboot your server to apply changes.
To access the Import Wizard, you need the pve-esxi-import-tools package installed. This package can be found in the pvetest or pve-no-subscription repositories. To add these repositories:
echo “deb http://download.proxmox.com/debian/pve-no-subscription buster pve-no-subscription” >> /etc/apt/sources.list.d/pve.list apt update
Then install the tools:
apt install pve-esxi-import-tools
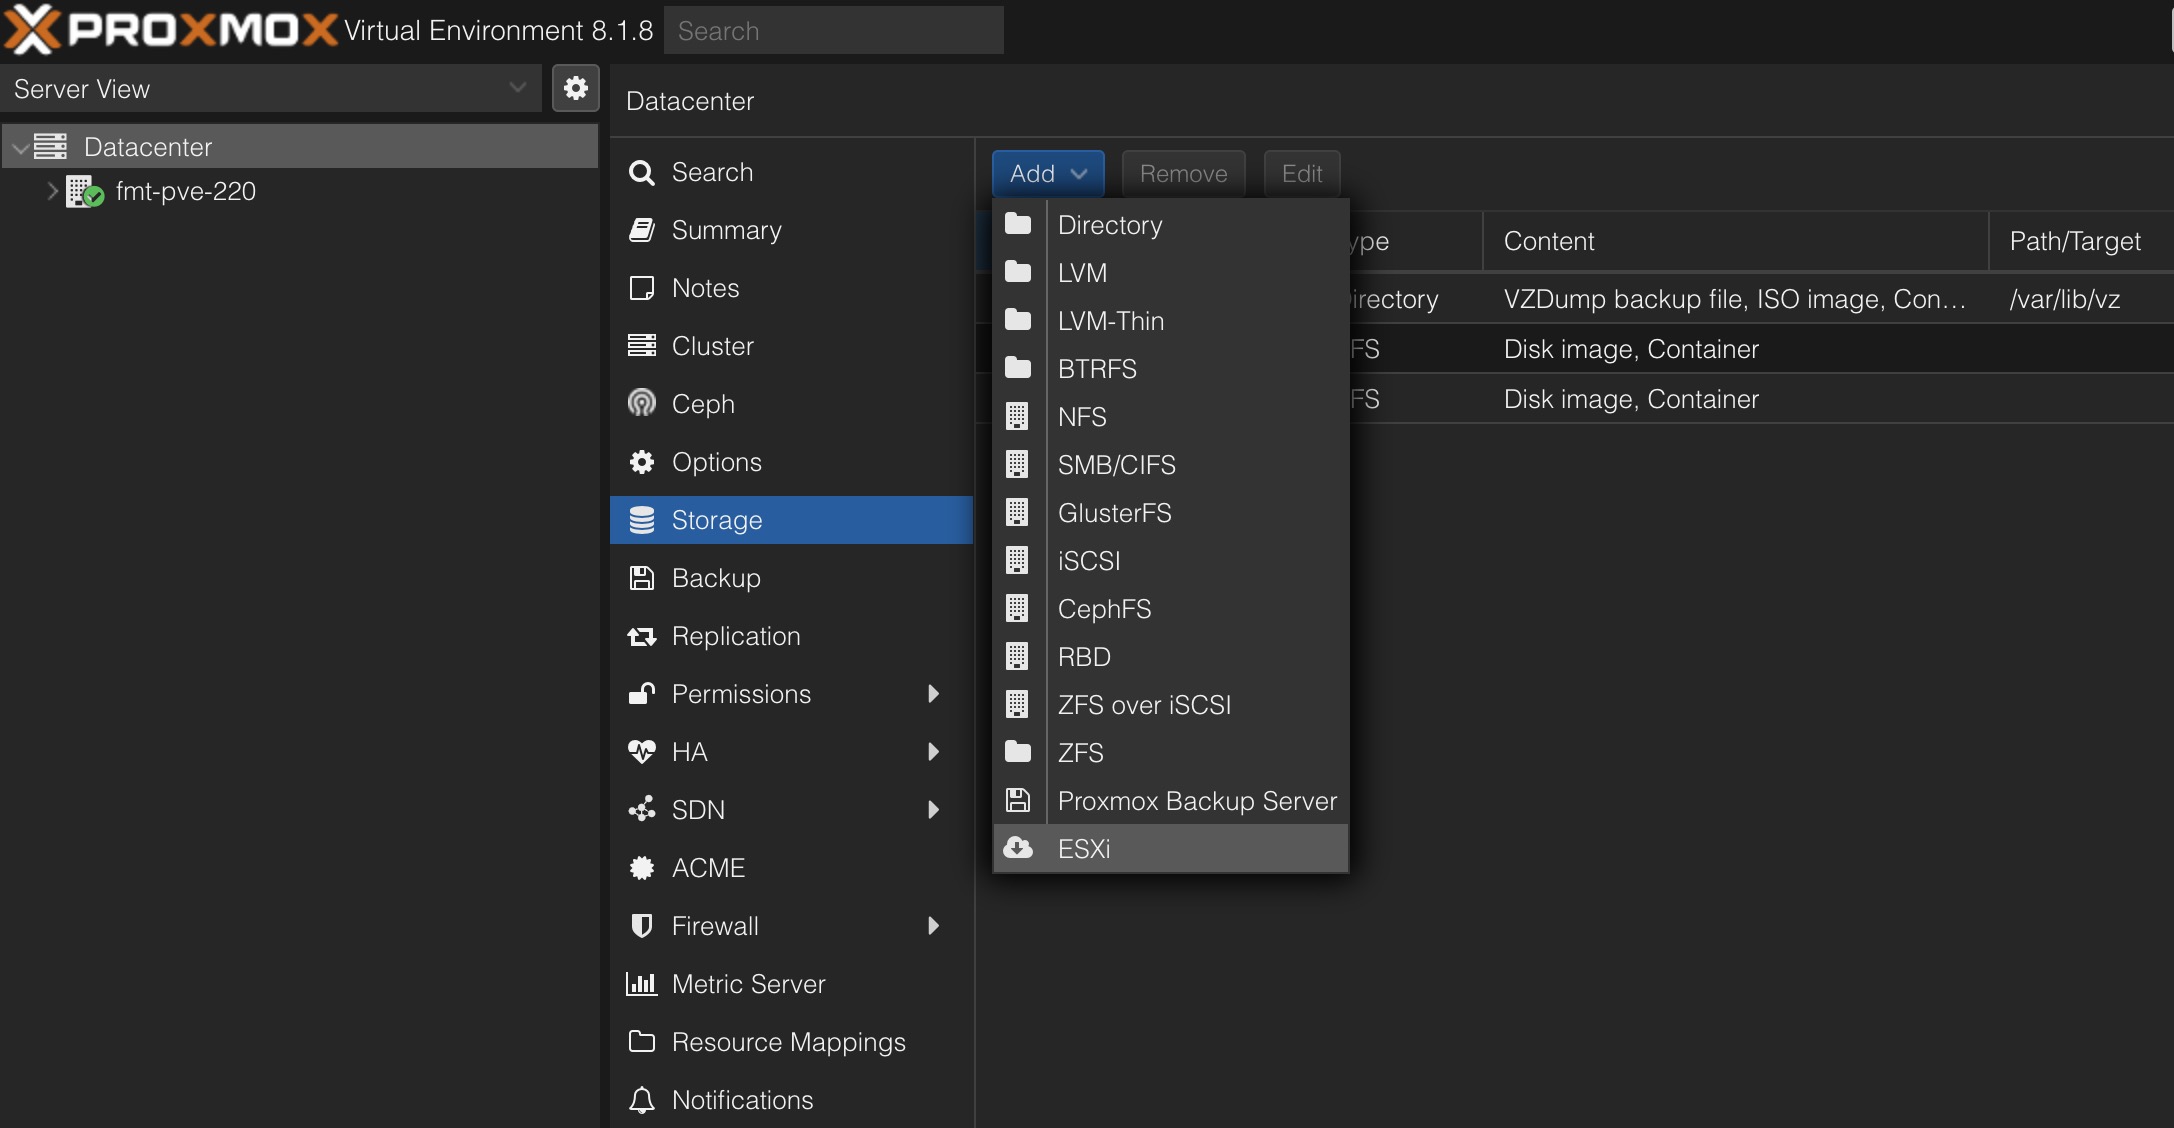
3. Add ESXi as a Storage Source
Navigate to Datacenter -> Storage -> Add in the Proxmox web interface. Select “ESXi” as your storage type and enter your ESXi host’s IP address along with administrative credentials.This step allows Proxmox to access your existing VMs on the ESXi host.
4. Launch the Import Wizard
Once the ESXi storage is added successfully, select it from the resource tree. You will see a list of available VMs. Choose a VM you wish to import and click on the “Import” button.
5. Configure Import Settings
During this stage, you will configure several settings:
- Target Storage: Select where you want to store the VM disks in Proxmox.
- Network Configuration: Choose how you want your VM’s network interfaces configured.
- Advanced Options: Here you can specify additional settings such as disk types (e.g., VirtIO) or modify CPU settings.
6. Review and Confirm Configuration
In the “Resulting Config” tab, review all configurations before proceeding with the import. Ensure everything is set up as desired.
7. Power Down Source VM
For consistency during migration, power down your VM on the ESXi side before starting the import process.
8. Start Importing
Initiate the import process by clicking “Start.” Depending on your VM size and network speed, this may take some time.
9. Post-Migration Checks
Once imported, boot up your VM in Proxmox and check if everything is functioning correctly. You may need to install VirtIO drivers if you chose VirtIO as your disk type during configuration.
Conclusion
Migrating from VMware ESXi to Proxmox VE using the Import Wizard can significantly streamline your virtualization management process while providing cost savings and enhanced features. By following this comprehensive guide, you can ensure a successful transition with minimal downtime and disruption.For further assistance or community support, consider visiting Proxmox Forums or checking out their official documentation.